iOS SDK
You can download the SDK from the Github repository but the easiest way install it is using CocoaPods. With CocoaPods you just need to create a Podfile with this content:
platform :ios, '6.0'
pod 'Backbeam'
And then like with any other pod you just need to run
pod install
Now you can open the *.xcworkspace directory created by CocoaPods.
In your code you will need to import Backbeam.h as follows:
#import "Backbeam.h"
If you put that import statement in your *Prefix.pch file then all your files will import it automatically. Your prefix file could look like this:
//
//  Prefix header
//
//  The contents of this file are implicitly included at the beginning of every source file.
//

#import <Availability.h>

#ifndef __IPHONE_3_0
#warning "This project uses features only available in iOS SDK 3.0 and later."
#endif

#ifdef __OBJC__
    #import <UIKit/UIKit.h>
    #import <Foundation/Foundation.h>
    #import "Backbeam.h" // import Backbeam
#endif
Configure your application
The best place to configure the Backbeam framework is in your AppDelegate. The configuration depends on a few things. First of all you need to decide if you are going to use server-side business logic or not. Check out the differences between both possibilities.
Using client-side bussiness logic
If you are going to use client-side business-logic you just need to tell Backbeam which is the identifier of your project, which environment are you using, and the API keys.
#import "Backbeam.h"

- (BOOL)application:(UIApplication *)application didFinishLaunchingWithOptions:(NSDictionary *)launchOptions
{
    [Backbeam setProject:@"your_project"
        sharedKey:@"your-shared-key"
        secretKey:@"your-secret-key"
        environment:@"dev"];

    // set up your application interface...
}
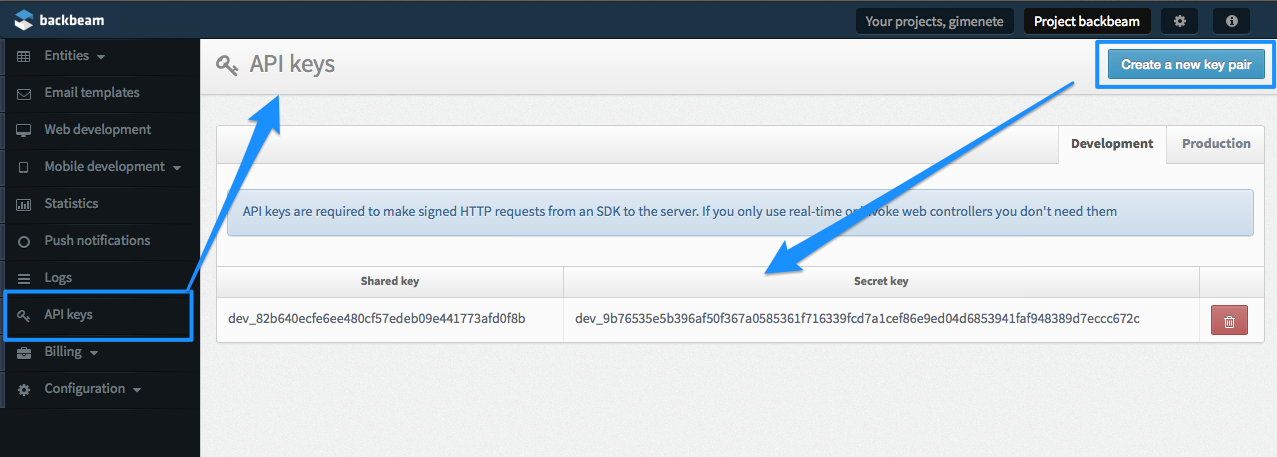
You can generate new API keys in the control panel as you can see in the following screenshot.
Using server-side business logic
If you are going to use only server-side logic you don't need a pair of API keys. You will write the business logic inside web controllers. To start writing web controller you need to create a new web version in the control panel, and then, start creating controllers with business logic inside. This is how you create a new web version:
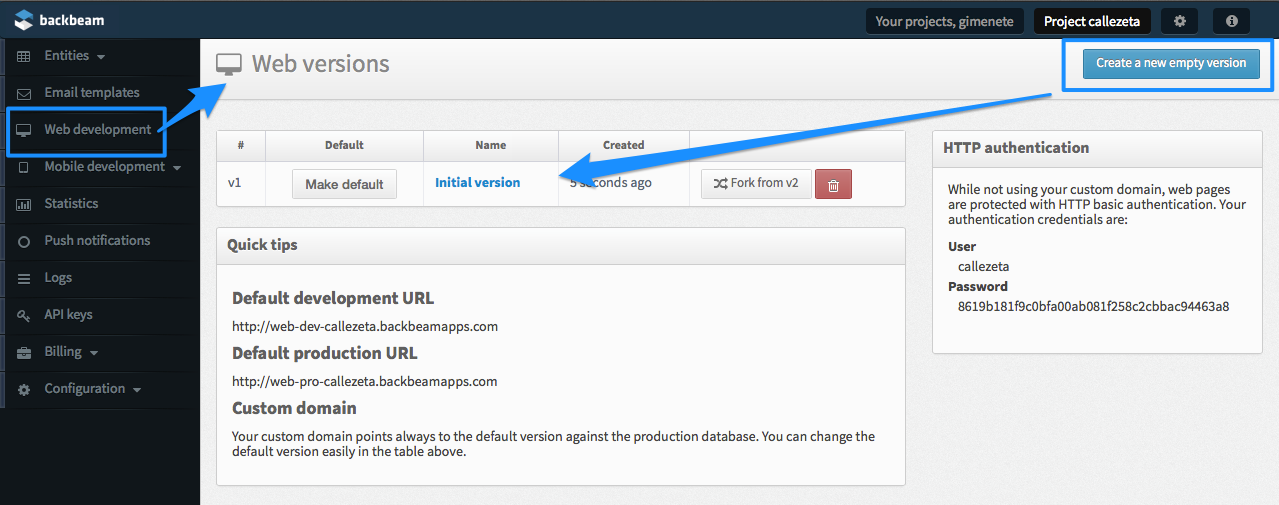
In this page on the right you see information regarding HTTP authentication. You will need this information in a moment
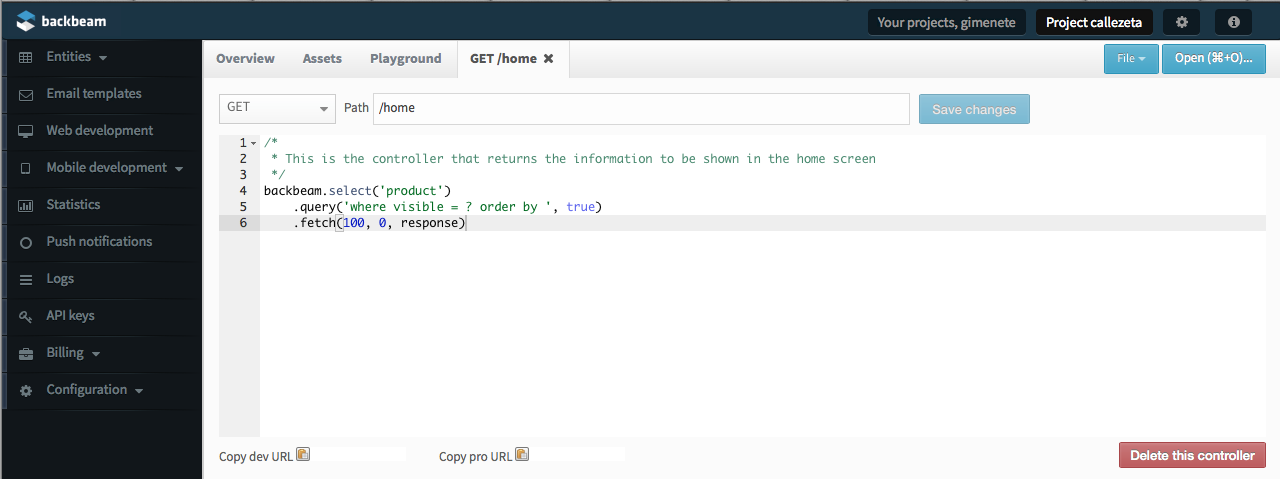
And then this is how it looks like to write server-side logic.
Now it's time to configure your application to use server-side logic. All you need to configure is your project identifier, the environment that you are going to use (dev or pro), leave the API keys to nil, and set the web version and HTTP authentication token. You will find this token in the versions screen in your control panel, on the right.
#import "Backbeam.h"

- (BOOL)application:(UIApplication *)application didFinishLaunchingWithOptions:(NSDictionary *)launchOptions
{
    [Backbeam setProject:@"your_project"
        sharedKey:nil
        secretKey:nil
        environment:@"dev"];

    [Backbeam setWebVersion:@"v1"];
    [Backbeam setHttpAuth:@"567ebfe8c8084e8b3dcb346550a894086109c87c"];

    // set up your application interface...
}
Using both client-side and server-side logic
You can use client-side and server-side logic at the same time in your application. You just need to set all the configuration parameters: API keys, web version and HTTP auth token. But our recommendation is to always use one method or the other. But, yes, you can use both at the same time.
Optional settings to configure
If you are going to use third party providers for users authentication you can also configure the API keys/tokens used in those services.
// For Twitter authentication
[Backbeam setTwitterConsumerKey:@"..." consumerSecret:@"..."];
// For LinkedIn authentication.
[Backbeam setLinkedInClientId:@"..." clientSecret:@"..."];
// For GitHub Authentication
[Backbeam setGitHubClientId:@"..." clientSecret:@"..." callbackURL:@"..."];
If you are going to use Facebook or Google+ authentication you will need the SDKs that they provide. You will learn more about users authentication later in this chapter.