Android SDK
You can download the Andriod SDK from the GitHub repository. This includes the source code as well as the third-party libraries on which the SDK depends.
Now, to start using the SDK in your project:
- If you are using Eclipse import the SDK to your Eclipse workspace and then in the section decicated to Android click on "Add library project"
- If you are using Android Studio add the SDK to the "libraries" folder of your project. You need to change both the settings.gradleand the build.gradle file in order to include a reference to the SDK
The next step is to be sure to indicate that your application needs Internet access in your manifest AndroidManifest.xml:
<uses-permission android:name="android.permission.INTERNET" />
Now you can start coding. All the classes of the SDK are placed in the io.backbeam package. So you can import them individually or import the whole package:
import io.backbeam.*;
Configure your application
The best place to configure the Backbeam singleton is on the main activity of your application. The configuration depends on a few things. First of all you need to decide if you are going to use server-side business logic or not. Check out the differences between both possibilities.
Using client-side bussiness logic
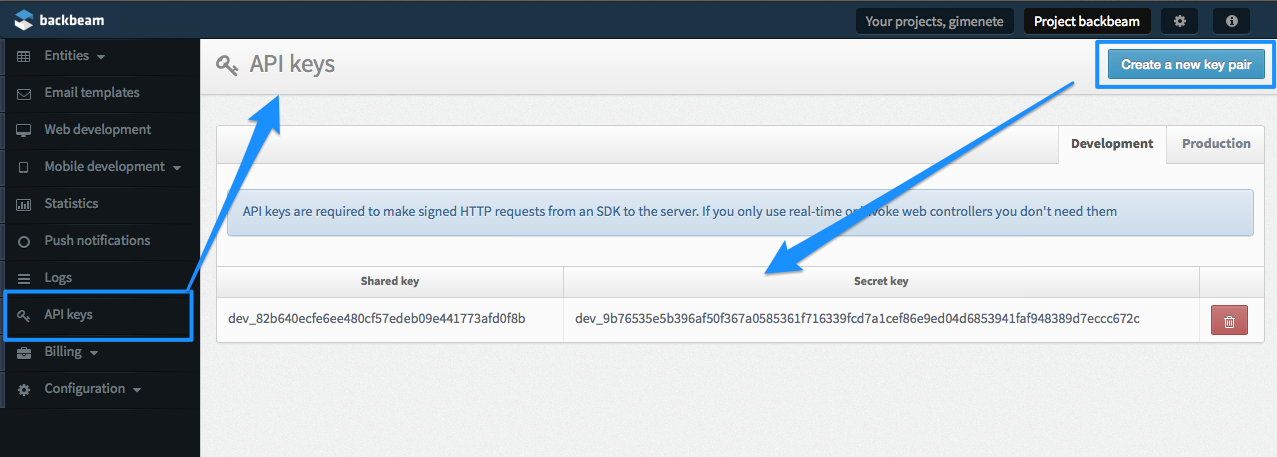
If you are going to use client-side business-logic you just need to tell Backbeam which is the identifier of your project, which environment are you using, and the API keys.
Backbeam.setProject("your-project-identifier");
Backbeam.setEnvironment("dev"); // it must be 'dev' or 'pro'
Backbeam.setContext(getApplicationContext());

Backbeam.setSharedKey("your_shared_key");
Backbeam.setSecretKey("your_secret_key");
You can generate new API keys in the control panel as you can see in the following screenshot.
Using server-side bussiness logic
If you are going to use only server-side logic you don't need a pair of API keys. You will write the business logic inside web controllers. To start writing web controller you need to create a new web version in the control panel, and then, start creating controllers with business logic inside. This is how you create a new web version:
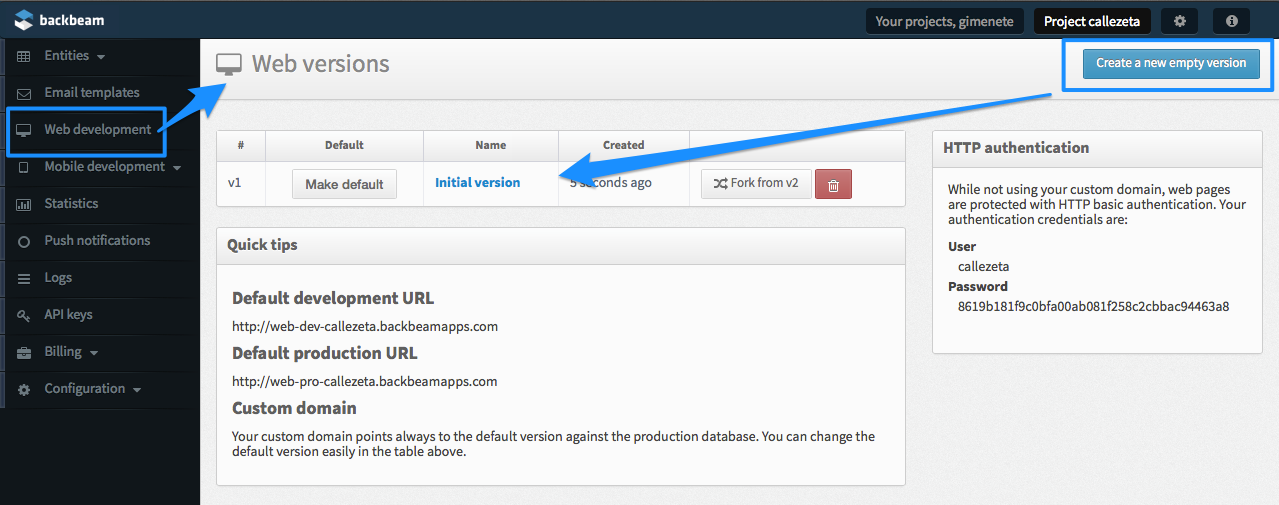
In this page on the right you see information regarding HTTP authentication. You will need this information in a moment
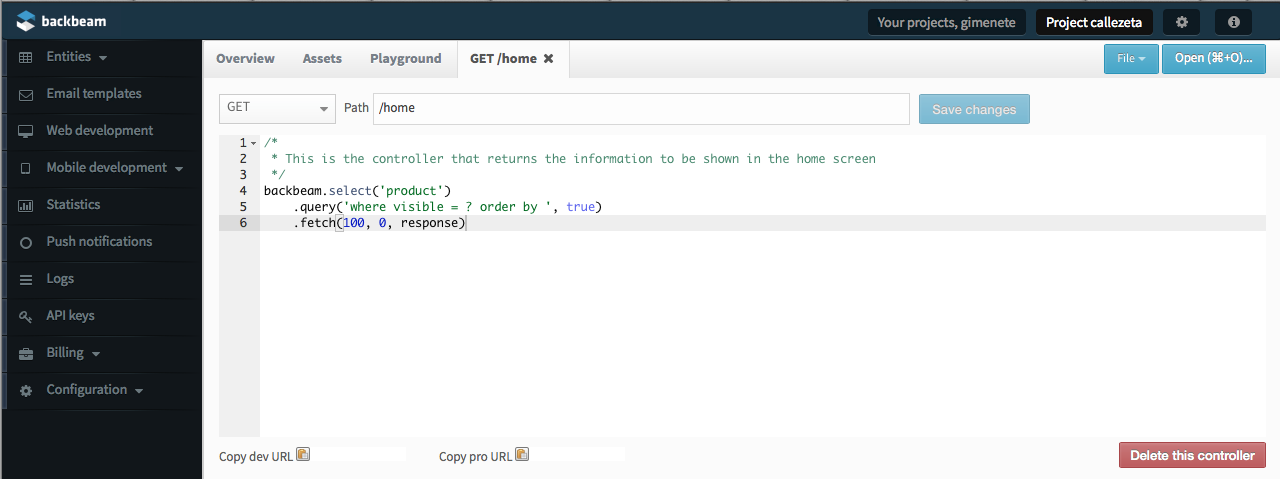
And then this is how it looks like to write server-side logic.
Now it's time to configure your application to use server-side logic. All you need to configure is your project identifier, the environment that you are going to use (dev or pro), and set the web version and HTTP authentication token. You will find this token in the versions screen in your control panel, on the right.
Backbeam.setProject("your-project-identifier");
Backbeam.setEnvironment("dev"); // it must be either 'dev' or 'pro'
Backbeam.setContext(getApplicationContext());

Backbeam.setWebVersion("v1");
Backbeam.setHttpAuth("xxxxxxxxxxx");
Using both client-side and server-side logic
You can use client-side and server-side logic at the same time in your application. You just need to set all the configuration parameters: API keys, web version and HTTP auth token. But our recommendation is to always use one method or the other. But, yes, you can use both at the same time.